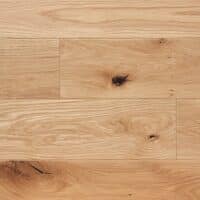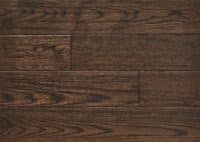
Wood flooring, especially solid oak floors, adds a touch of elegance and warmth to any space. However, even the sturdiest of floors can develop scratches and scuff marks over time.
Don’t worry — there’s no need to fret just yet. With a bit of wood care and the right techniques, you can easily restore your solid wood floor to its former glory.
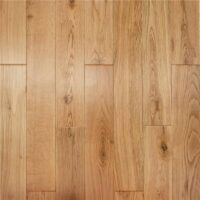
Understanding solid oak floors
Before diving into the solutions for fixing scratches, it’s essential to understand what solid oak floors are. Solid wood flooring, often referred to as hardwood flooring, is made from a single piece of real wood — in this case, oak. Solid wood flooring is known for its durability and timeless beauty, especially lacquered wood flooring for a touch of elegance. However, like any natural material, it can get scratched and scuffed with regular use as time flies by.
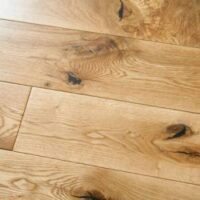
Assessing the damage to your oak flooring
The first step in repairing scratches on your solid oak floor is to assess the extent of the damage. Not all scratches are created equal, and the repair method you choose may depend on their depth and severity. It’s also important to remember that different types of wood flooring, such as herringbone floors, are more susceptible to damage. To assess the damage to your flooring, we have to start by looking at the depth of the scratches.
Light scratches: If you can feel the scratches with your fingernail but they are not too deep, you’re dealing with light scratches or scuff marks. You can breathe again now — these are the easiest to fix!
Medium scratches: If the scratches are more noticeable and can be seen without running your fingernail over them, they may be considered medium-depth scratches. These may require a bit more effort to repair.
Deep scratches: Deep scratches are those that have penetrated through the finish and into the wood itself. These can be challenging to repair and may require further professional help.
How to fix light scratches and scuff marks on oak flooring
For light scratches and scuff marks on your oak floor, you can try the following methods.
-
Wood scratch repair kit
Invest in a wood scratch repair kit, which typically includes a touch-up marker or crayon that matches your floor’s colour. Simply fill in the scratch with the marker, wipe away any excess, and let it dry. This should camouflage the light scratch effectively.
-
Baking soda and water
Create a paste by mixing baking soda with a small amount of water. Gently rub the paste into the scratch using a soft cloth or sponge. Then, simply rinse and wipe dry. This method can work wonders on light scratches.
-
Paste wax
Wooden floor paste wax fills the gaps and marks on the surface of the wood, making it particularly useful for filling in and smoothing out any scratches or damage. Wax also has the benefit of waterproofing, reducing the chance of the wood absorbing moisture and its condition deteriorating.
Repairing medium scratches on wooden flooring
For medium-depth scratches on your solid wood flooring, you may need to take slightly more complex measures.
Sandpaper
Start with fine-grit sandpaper (around 120-150 grit) and sand the scratched area gently in the direction of the wood grain. Be careful not to sand too aggressively, as you don’t want to damage the surrounding area. Once the scratch has lightened or disappeared, switch to a finer grit sandpaper (220-240 grit) to smooth the surface.
Wood filler
If the scratches are still visible after sanding, you can fill them with a matching wood filler. Apply the filler to the scratch, let it dry, and sand it smooth. Finish by applying a wood finish or clear coat to the repaired area to blend it with the rest of the floor.
Please note that you should avoid silicone-based polishes when caring for your wooden furniture and fittings, as these tend to build-up on the wood’s surface and can affect the original finish of the wood flooring.
Dealing with deep scratches
Deep scratches that have penetrated the wood require more advanced solutions and may warrant professional assistance:
Wood putty
Use wood putty or epoxy filler to fill deep scratches. Ensure that the filler matches the colour of your oak floor. Apply it to the scratch, let it dry, and sand it down until it’s level with the rest of the floor. Finish with a clear coat to protect the repaired area.
Professional refinishing
If the deep scratches are extensive or widespread, it’s best to consult a professional, or replace your wood floors completely. A wood flooring professional can sand the entire floor, removing the damaged layer and refinishing it to perfection. This process will give your solid oak floor a brand-new look.
Need some extra guidance? Get in touch with our team and we’ll be more than happy to advise you on the best course of action.
How to prevent scratches on oak flooring
Once you’ve successfully repaired the scratches on your solid oak flooring, it’s crucial to take preventive measures to keep your floor looking pristine. Here are some tips:
- Place mats or rugs in high-traffic areas to reduce wear and tear.
- Use felt pads or furniture glides under heavy furniture to prevent scuffing.
- Trim your pet’s nails regularly to prevent scratches from pets.
- Avoid walking on the floor with sharp or abrasive shoes.
- Clean your wood floor regularly with a soft, microfibre mop to remove dirt and debris.
Minimise your floor maintenance with A Wood Idea
The best way to make sure your floor stands the test of time is to start with high-quality materials. By opting for a solid oak floor from A Wood Idea, you can feel confident knowing your floor is sturdy and reliable, but will also minimise maintenance hassles, including the need to repair scratches for years to come.
At A Wood Idea, take a look at the natural beauty and durability of our solid oak flooring yourself by visiting our showroom at Blaydon Trade Park.
Browse our flooring collections today or get in touch with us to find out more.